
Revenue groups allow you to assign POS items to the revenue group that sales are reported against in Loaded.
🔐 What You’ll Need
🔑 Manager Permissions
If you don’t have access to your Company Settings, ask someone with Manager permissions to update your access.
Accessing Revenue Groups
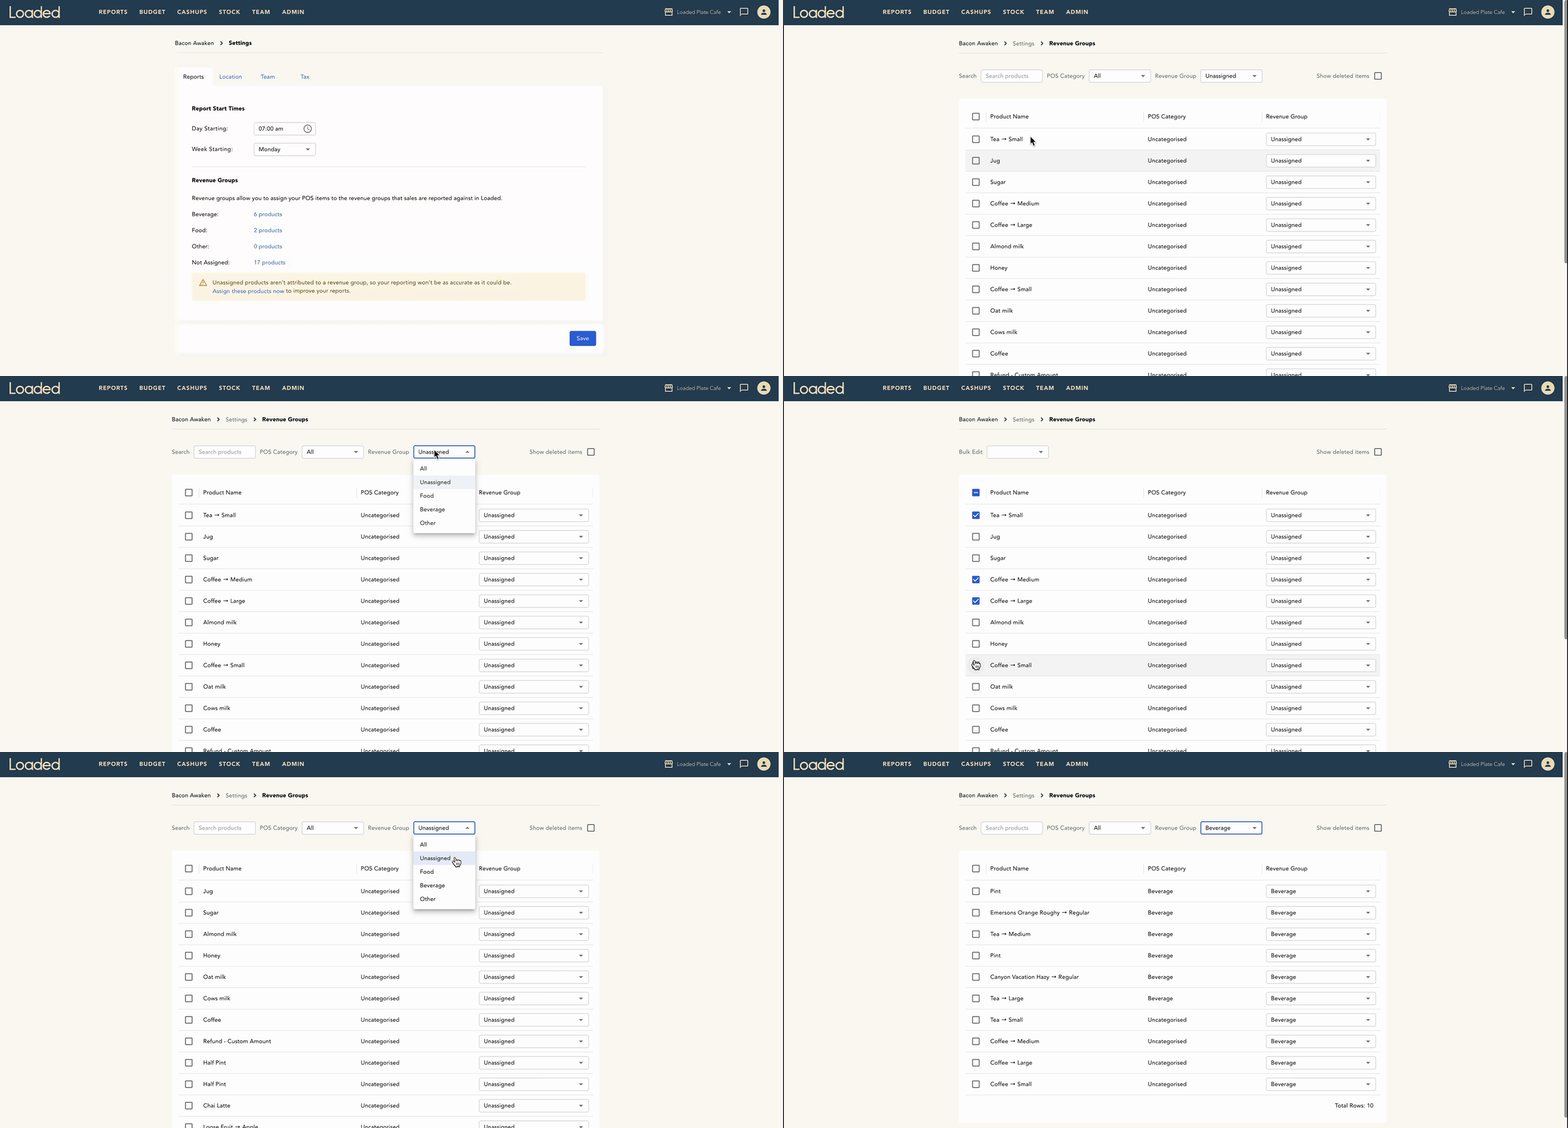
From any page in Loaded, click the Person icon in the top right then click Venue settings. On the Reports tab, Revenue Groups can be found at the bottom of the page.
This page displays all synced POS items, their assigned POS Categories and their current Loaded Revenue Group: Food, Beverage or Other.
Click Assign these products now to get started matching your products to revenue groups. This is a great place to start when setting up reporting for the first time.
Assigning Revenue Groups
If multiple products belong in the same category, you can assign them in bulk by:
Ticking the items you want to update
Clicking Bulk Edit
Selecting the appropriate Revenue Group (e.g. Food)
Loaded will immediately move those items into the selected Revenue Group.
Some products may need a quick review before assigning.
You can:
Work through items one-by-one
Filter by POS Category
Search for specific products
Continue reviewing all remaining unassigned items
This helps keep your reporting clean and accurate across sales and cost analysis.
Tips & Tricks
Start with your largest or most common categories first
Use Bulk Edit to speed up setup
Review unusual or miscellaneous items individually before assigning
Keeping Revenue Groups accurate improves reporting visibility across Loaded
Next Steps
Once your Revenue Groups are assigned, you can continue setting up: