
If you're running a hospitality business, there's a good chance you've got a team of great people helping you. Adding staff members to Loaded means you can add them to a Roster, they can clock in and out of shifts using the Timeclock, and you can track when you're expecting them to work versus when they actually do.
What you'll need
Payroll permissions — if you don't have access to Company Settings, ask someone with Manager permissions to update your access.
You'll need to set up Roles for your company before adding staff members.
Australian customers: set up your Australian Award & Pay Classifications first via Team → Compliance → Pay Adjustments.
NZ companies — how to create a staff member
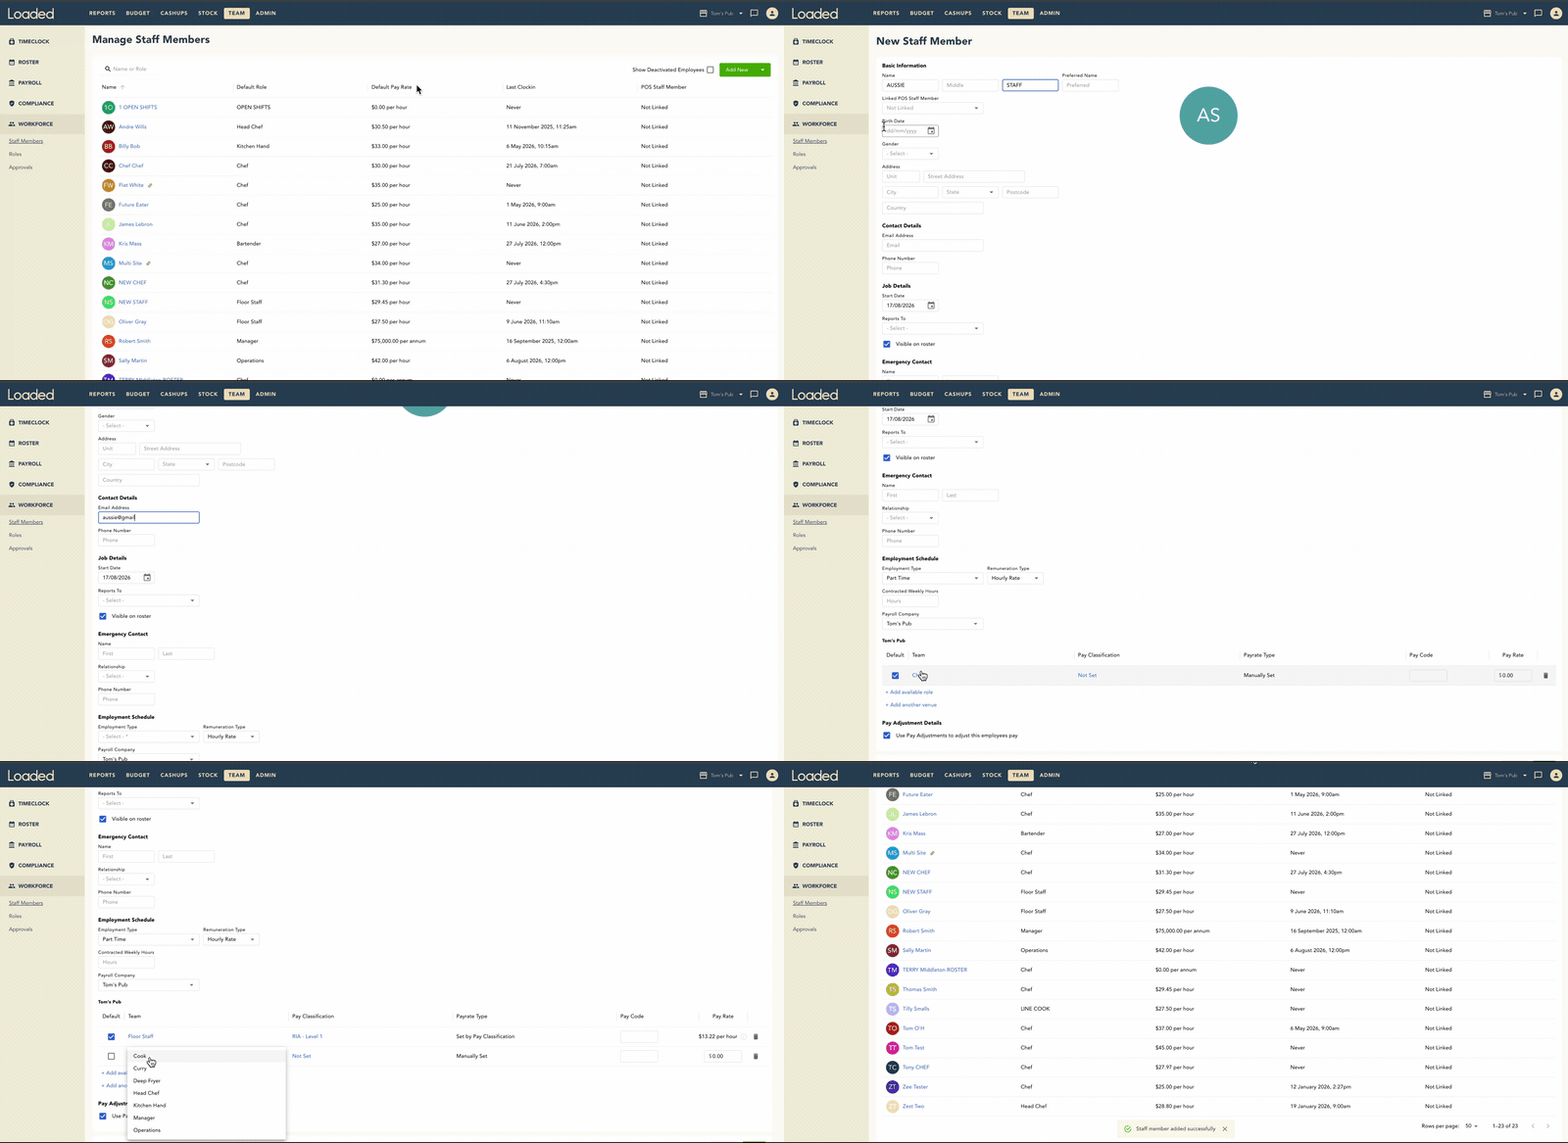
- Go to Team → Workforce → Staff Members
- Click Add New
- Fill out personal information (First Name, Last Name, Birth Date, Email — the login for Loaded's Team App) and job information (Employment Type, Remuneration Type, Available Role and Pay Rate — add multiple roles as needed)
- Add another venue if needed by clicking + Add another venue
- Set the Staff Pay Code, which depends on your payroll system
- Click Save
.gif)
AU companies — how to create a staff member
- Go to Team → Workforce → Staff Members
- Click Add New
- Fill out personal information (Birth Date is especially important for Junior Staff, since rates are calculated from it) and job information — if using Award Levels, select the Pay Classification and Loaded calculates the base pay rate automatically; if using custom rates, fill in the Pay Rate field directly
- Add another venue if needed
- Click Save
Editing staff member details
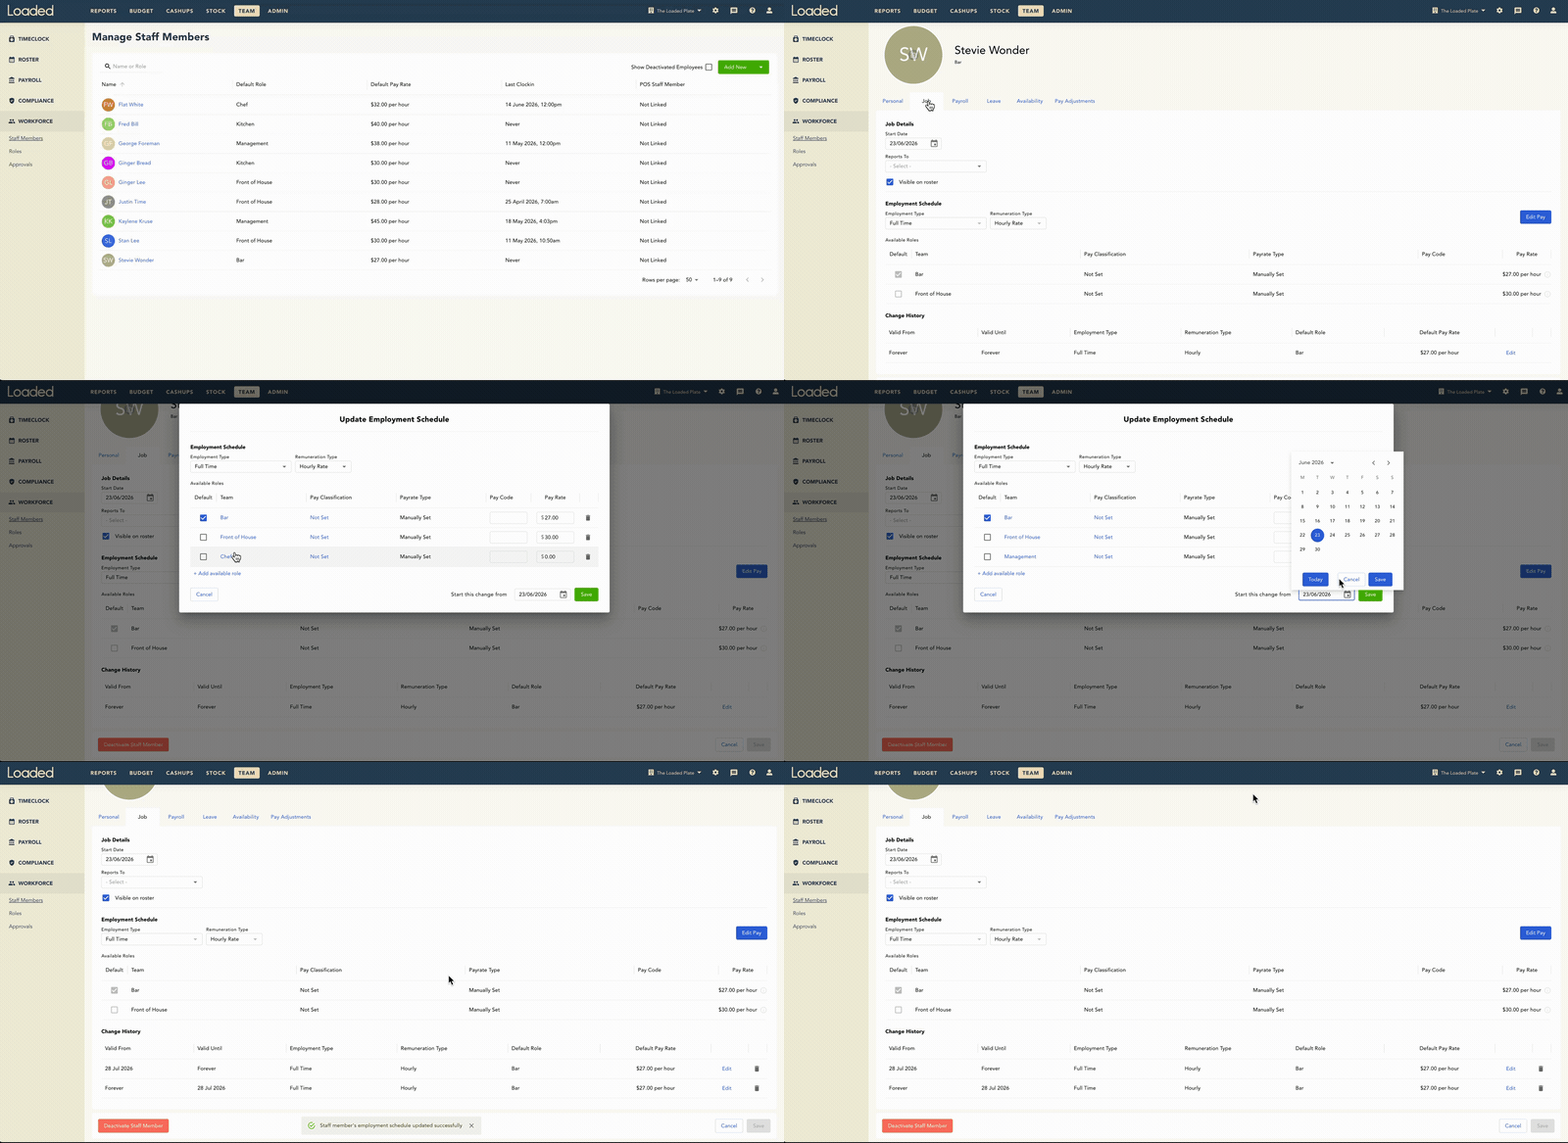
Click on a staff member's profile in Team → Workforce → Staff Members to see the Personal, Job, Payroll, Leave, Availability, and Adjustments tabs.

Personal tab
Update any field, then click Save. Personal details updated in the Team App will automatically sync back into Loaded.
Job tab
Edit Available Roles, Pay, Employment Type, and Remuneration Type by clicking Edit Pay. From here you can change Employment Type (Casual/Full Time/Part Time), switch between Hourly Rate and Salary (casual staff can only be Hourly), update Pay Classification for AU companies, or add a role for a new area of work. Set the date the change starts from and click Save — changes are recorded in the staff member's Change History, and locked rosters or timeclocks from before the change aren't affected.
Payroll tab
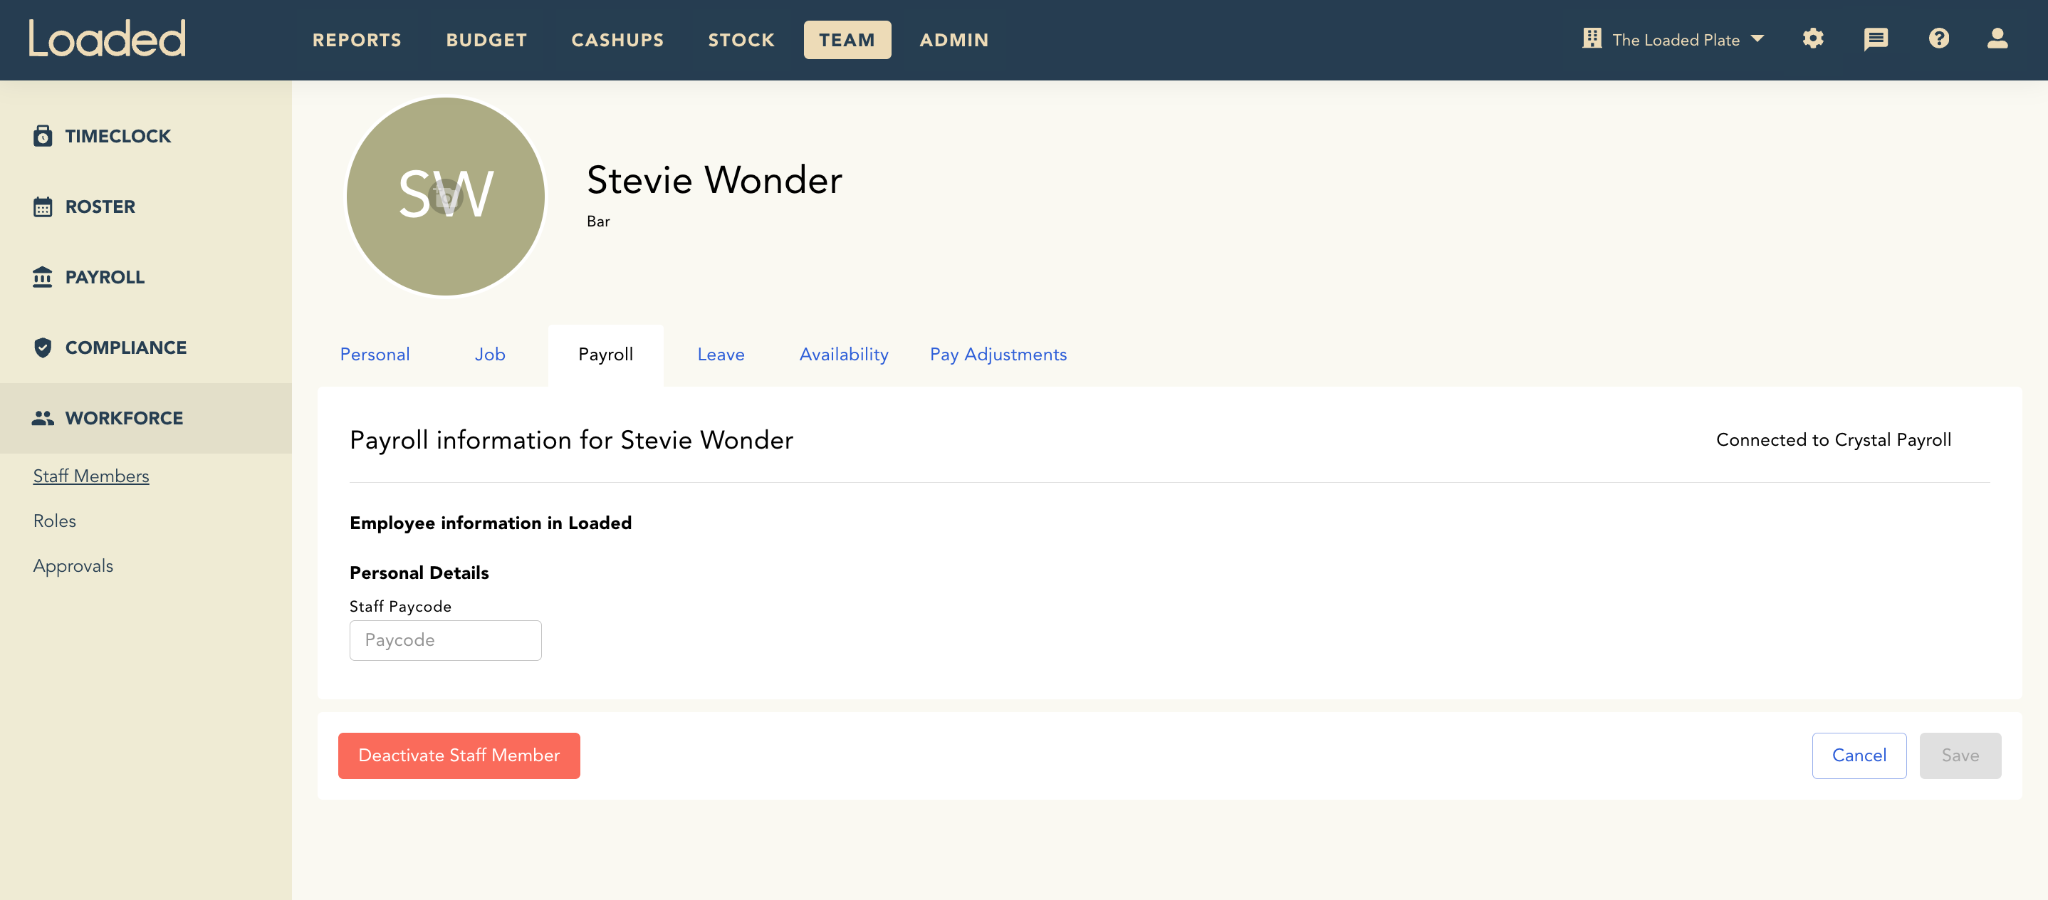
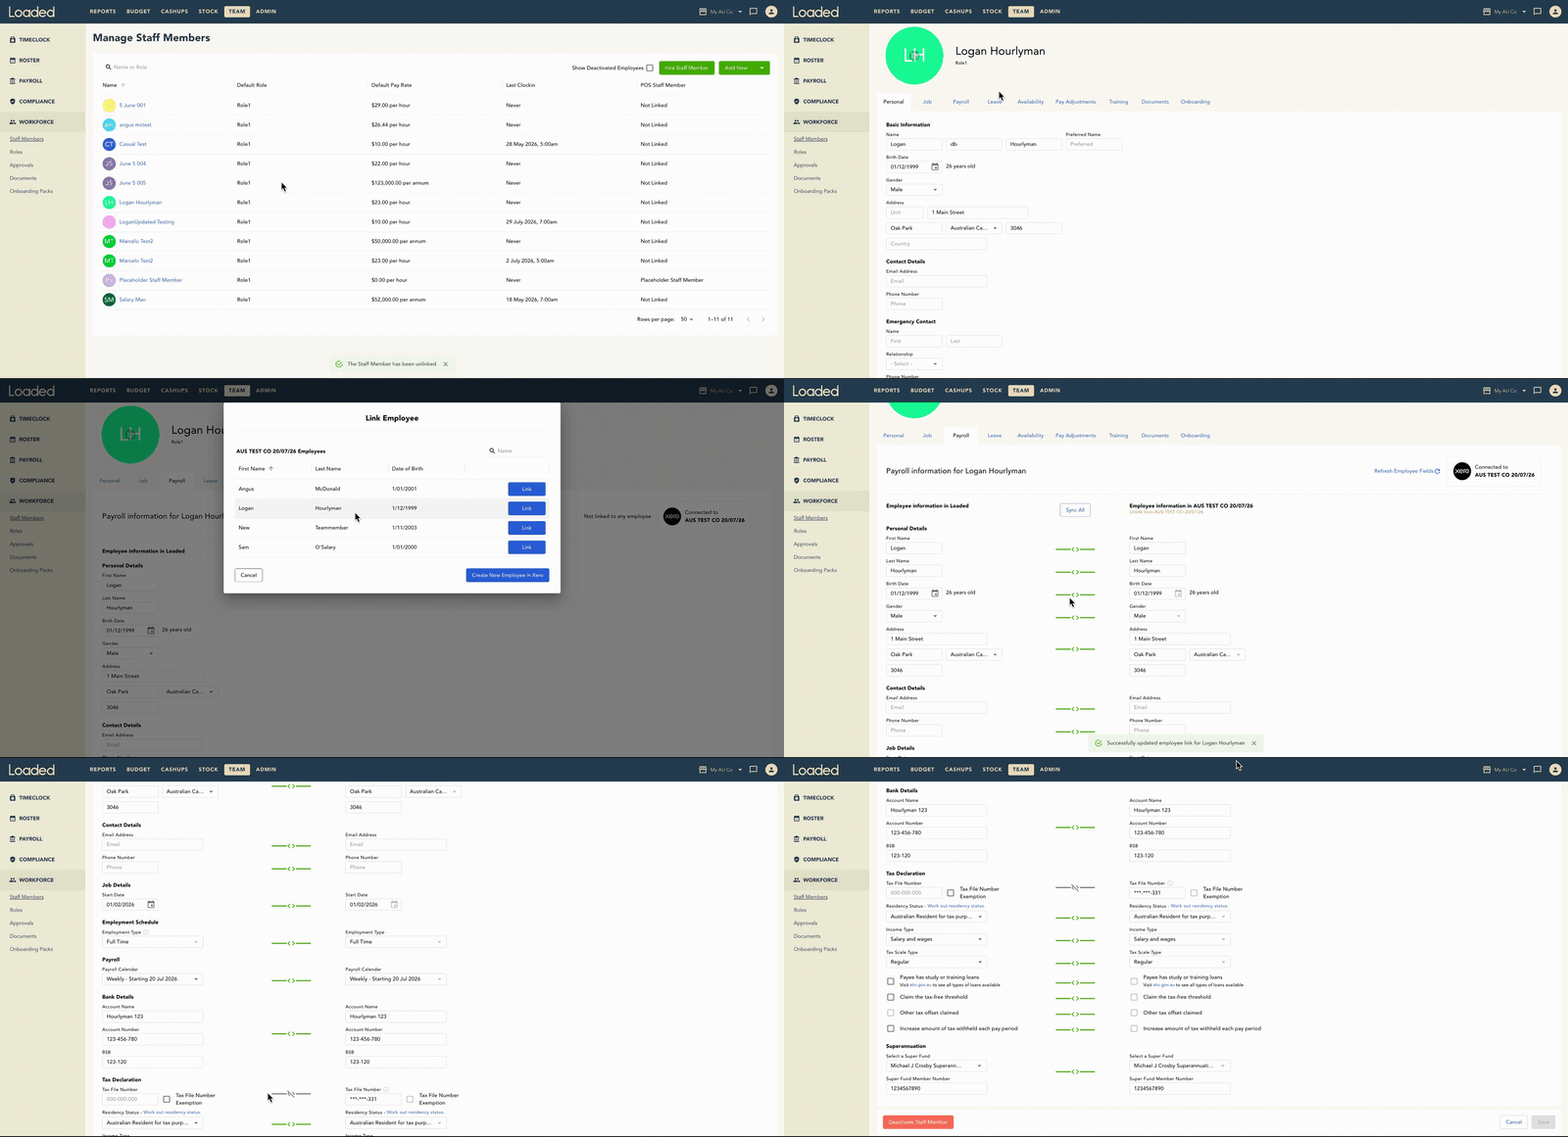
Edit the staff member's Paycode, which is often needed when exporting to your payroll system. Australian customers using Xero Payroll can link a staff member to a Xero employee here.
Leave tab
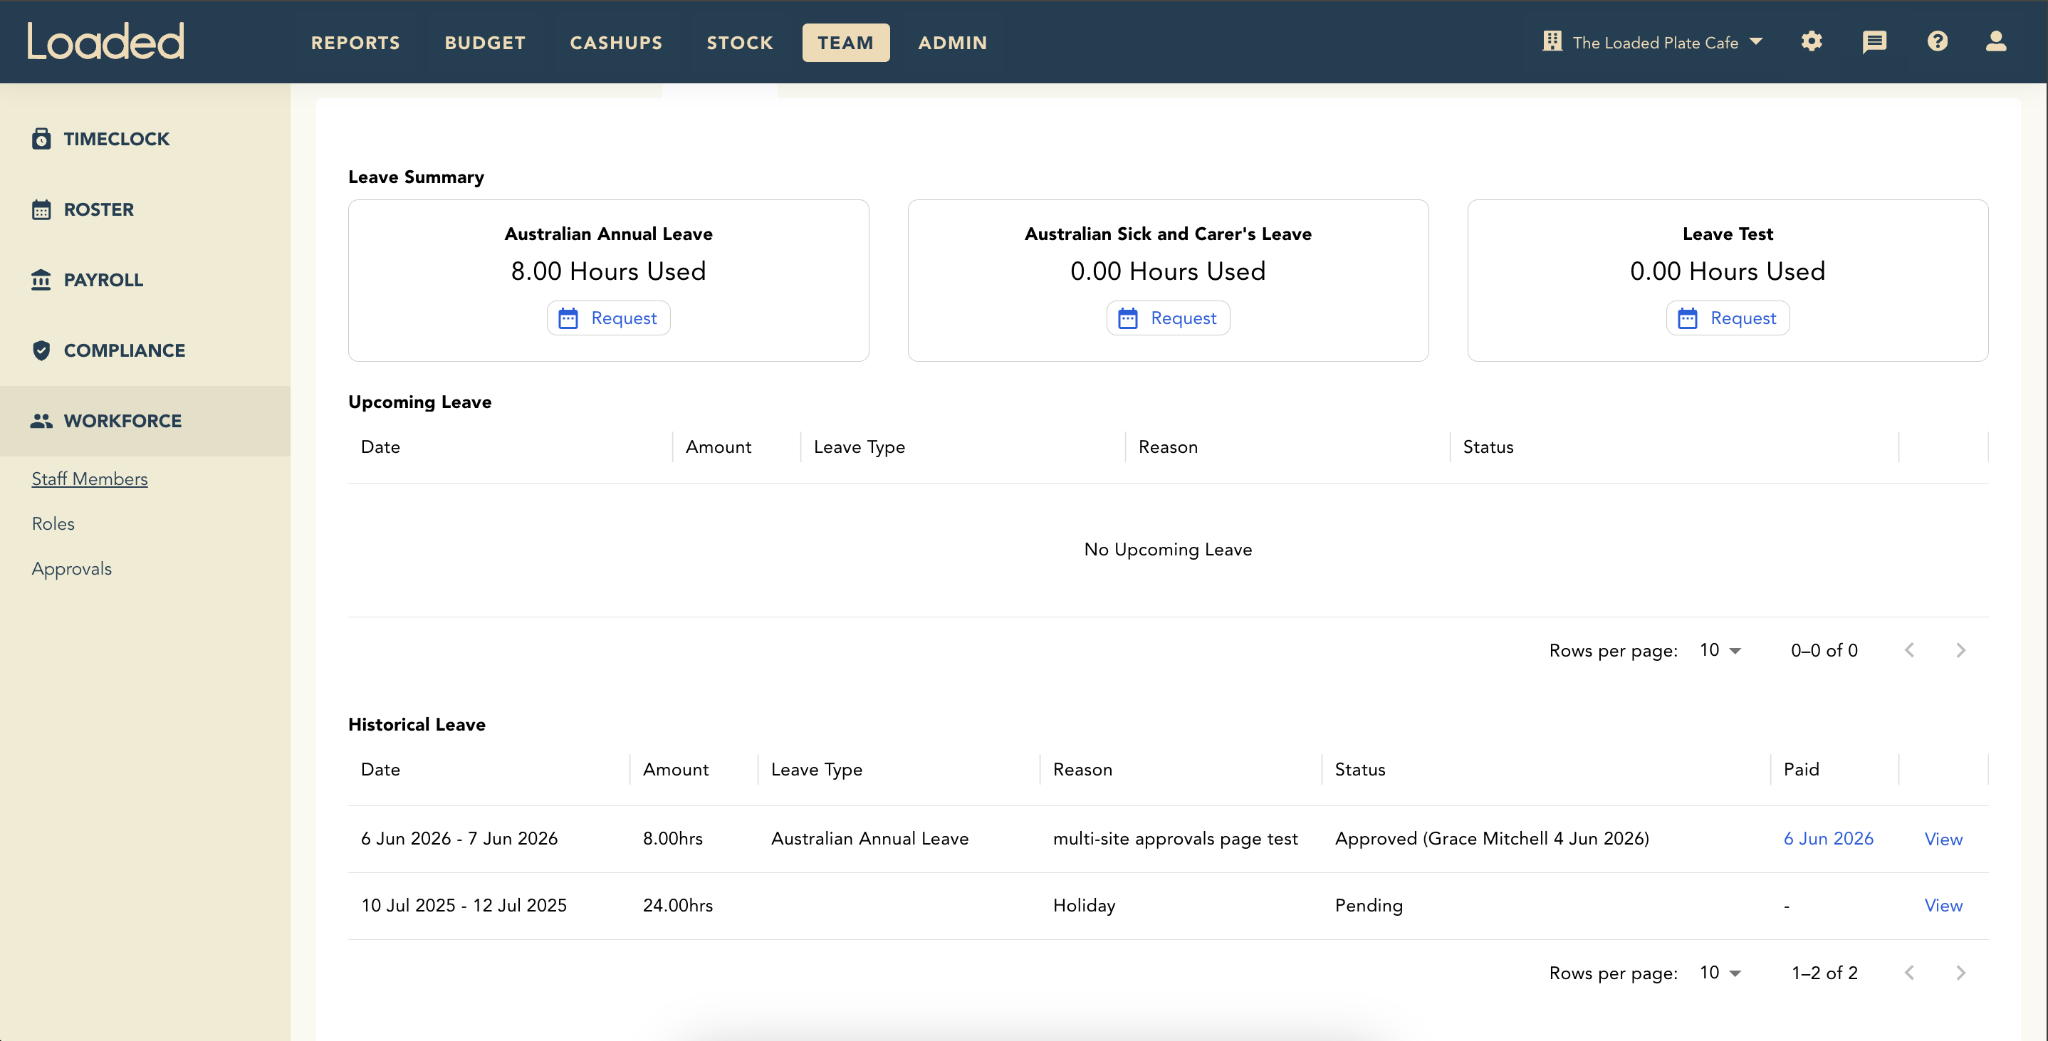
See a staff member's Leave Summary, Upcoming Leave, and Historical Leave — each request shows as approved, declined, cancelled, or pending. These numbers don't sync to payroll but give you oversight of each Leave Type.
Creating a leave request on behalf of an employee
- Go to Time → Workforce → Staff Members → Leave tab
- Click Request under the relevant Leave Type
- Enter the start/end day and time, reason for leave, and any supporting file
- Tick Automatically approve this request to approve it immediately, or leave it unticked to send it for manager approval
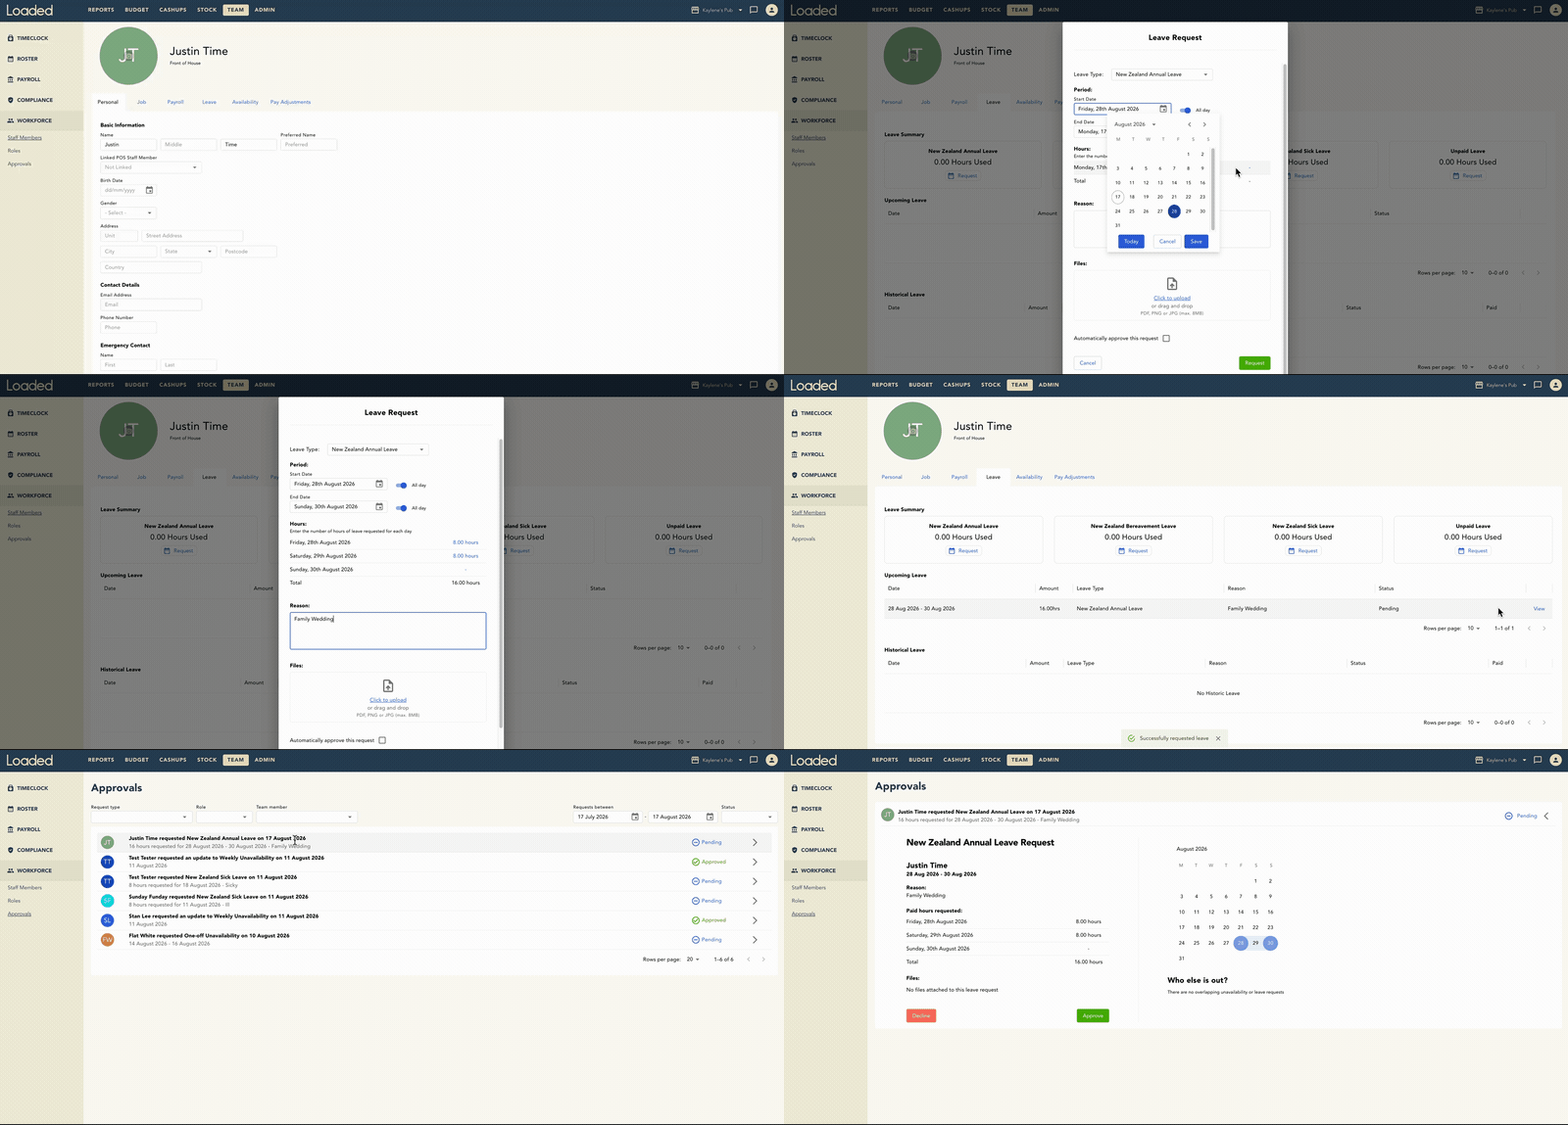
Anyone with the ApprovalsEmail permission is notified and can approve or decline by email or via Time → Workforce → Approvals. Employees can also submit their own leave requests via the Team App.
Availability tab
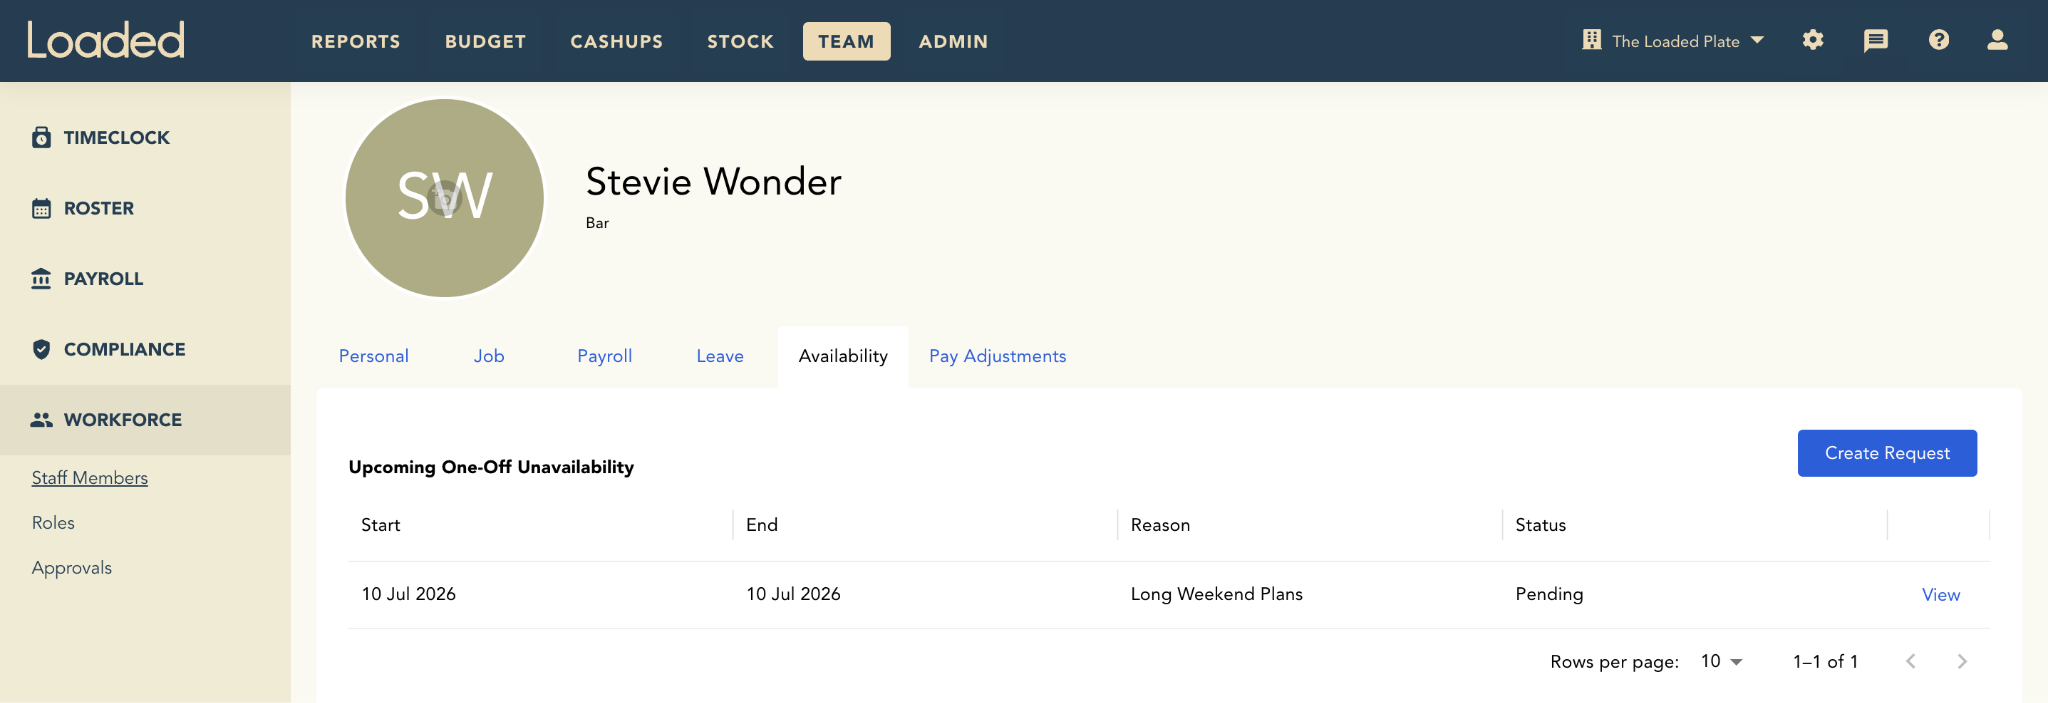
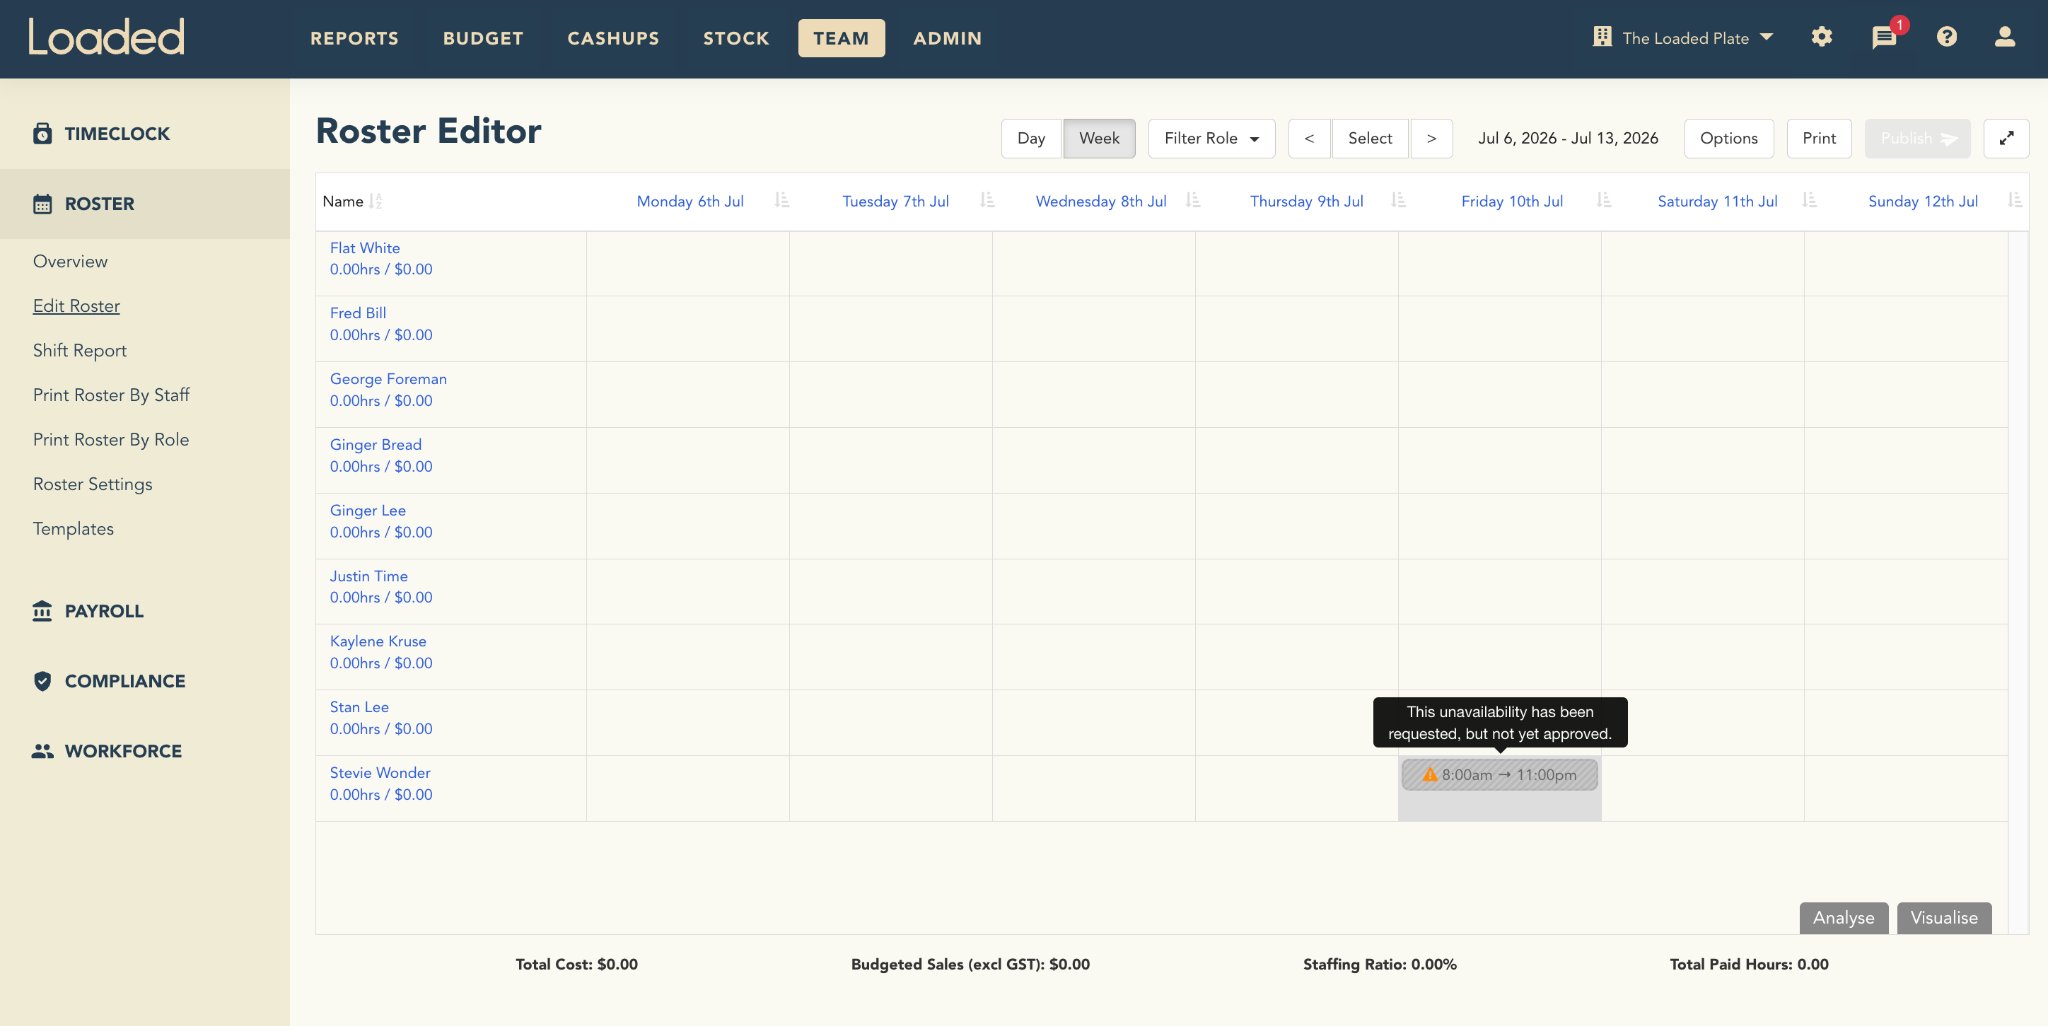
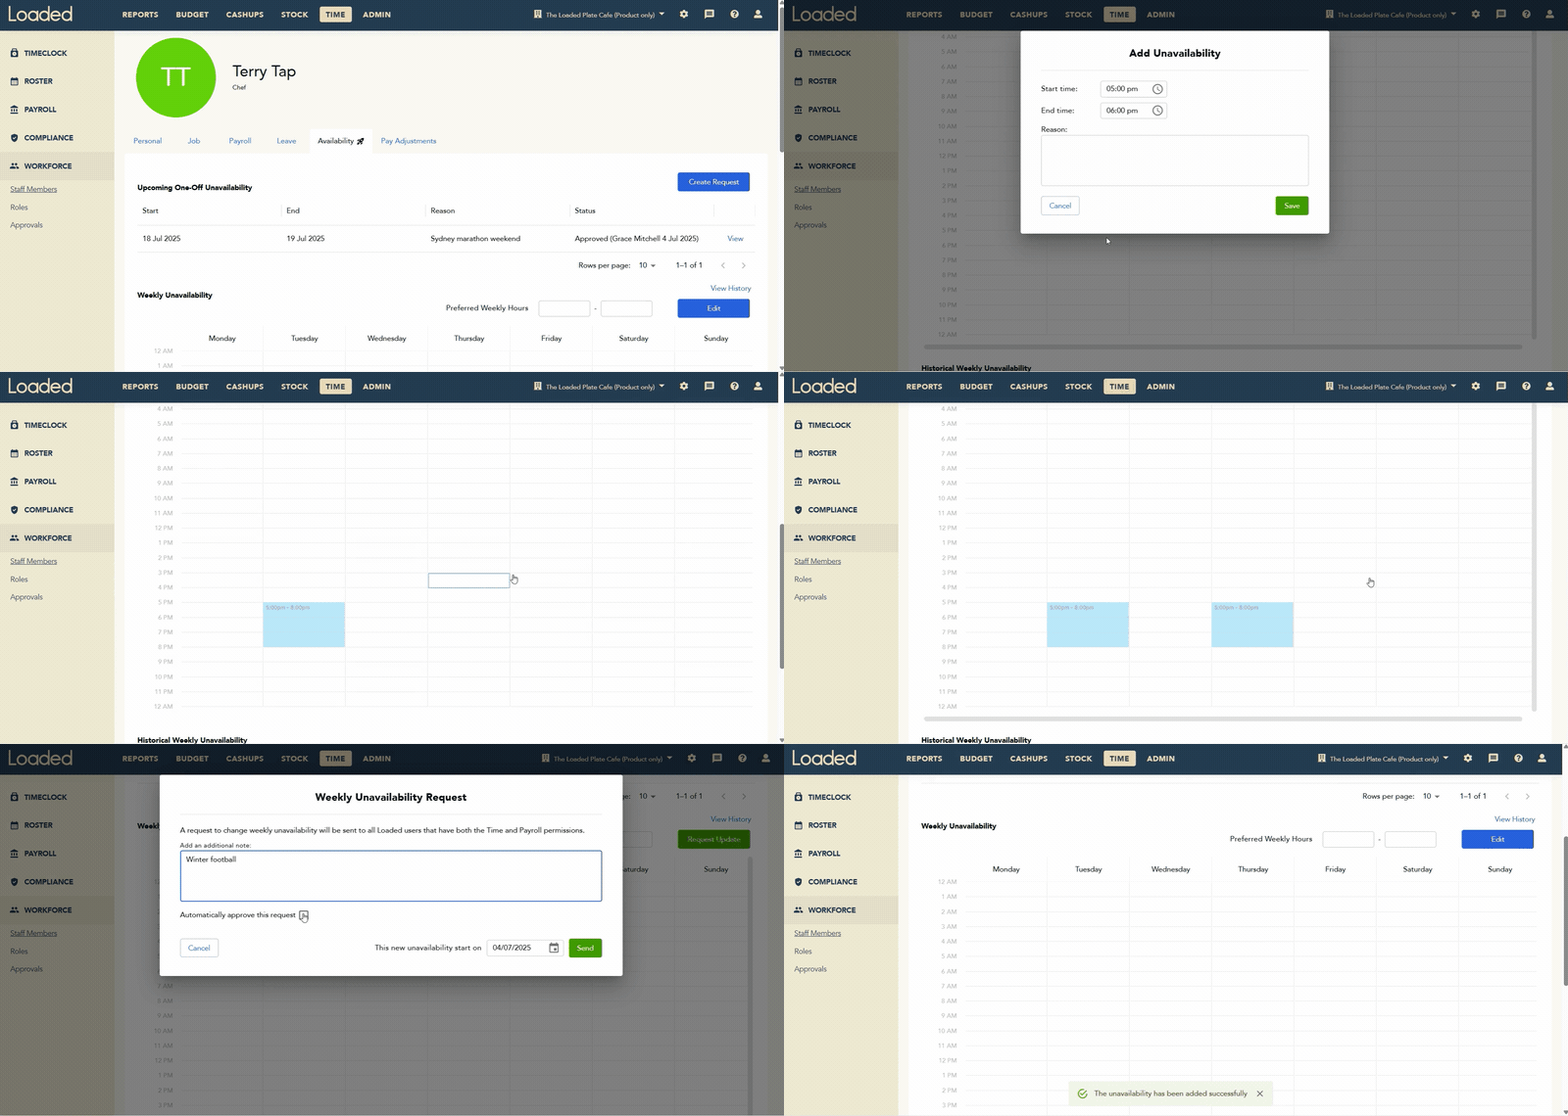
Request one-off unavailability or set weekly unavailability on a staff member's behalf.
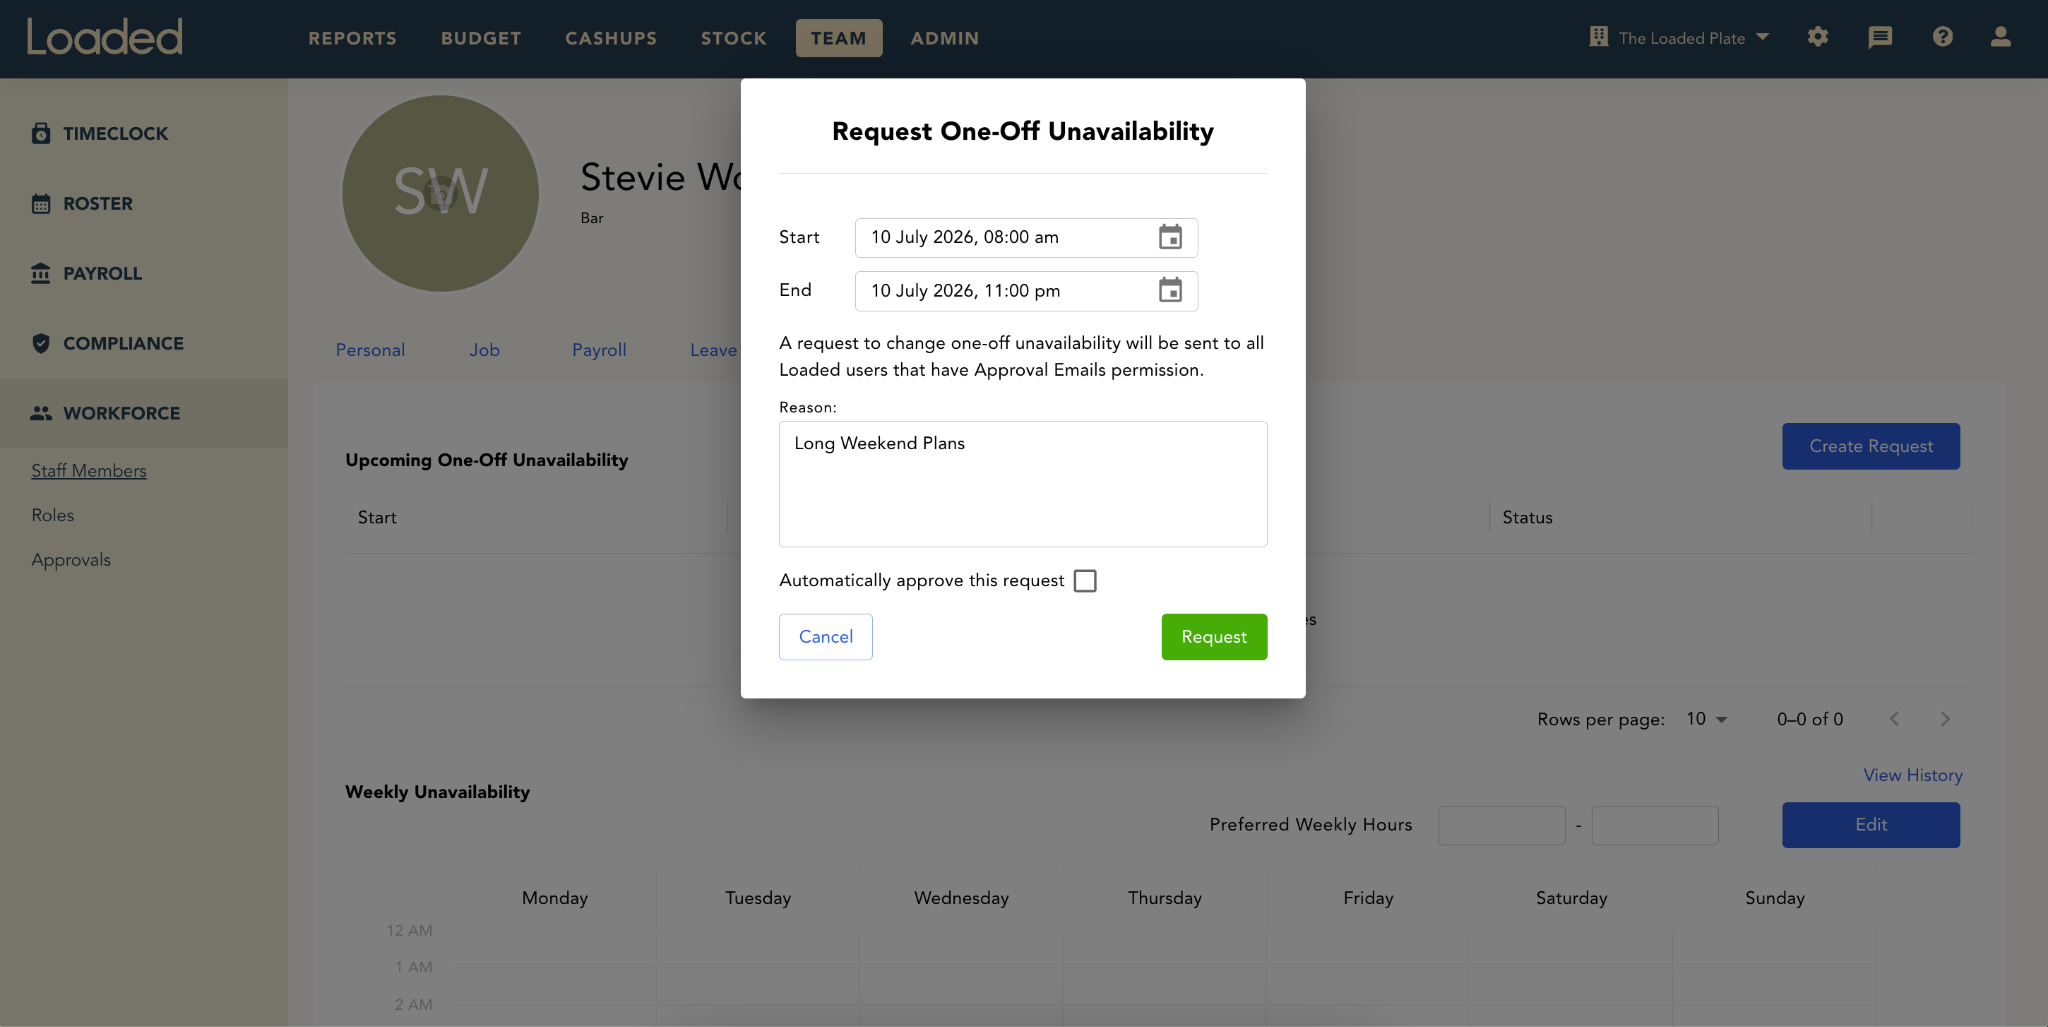
Click Create Request and fill in the details. The auto-approve option only shows if you have Time + Payroll permissions.
Weekly unavailability is useful for ongoing conflicts — another job, classes, sports practice, and so on. Click Edit on the Weekly Unavailability grid, then click a time slot to fill in details.
Pay Adjustments tab
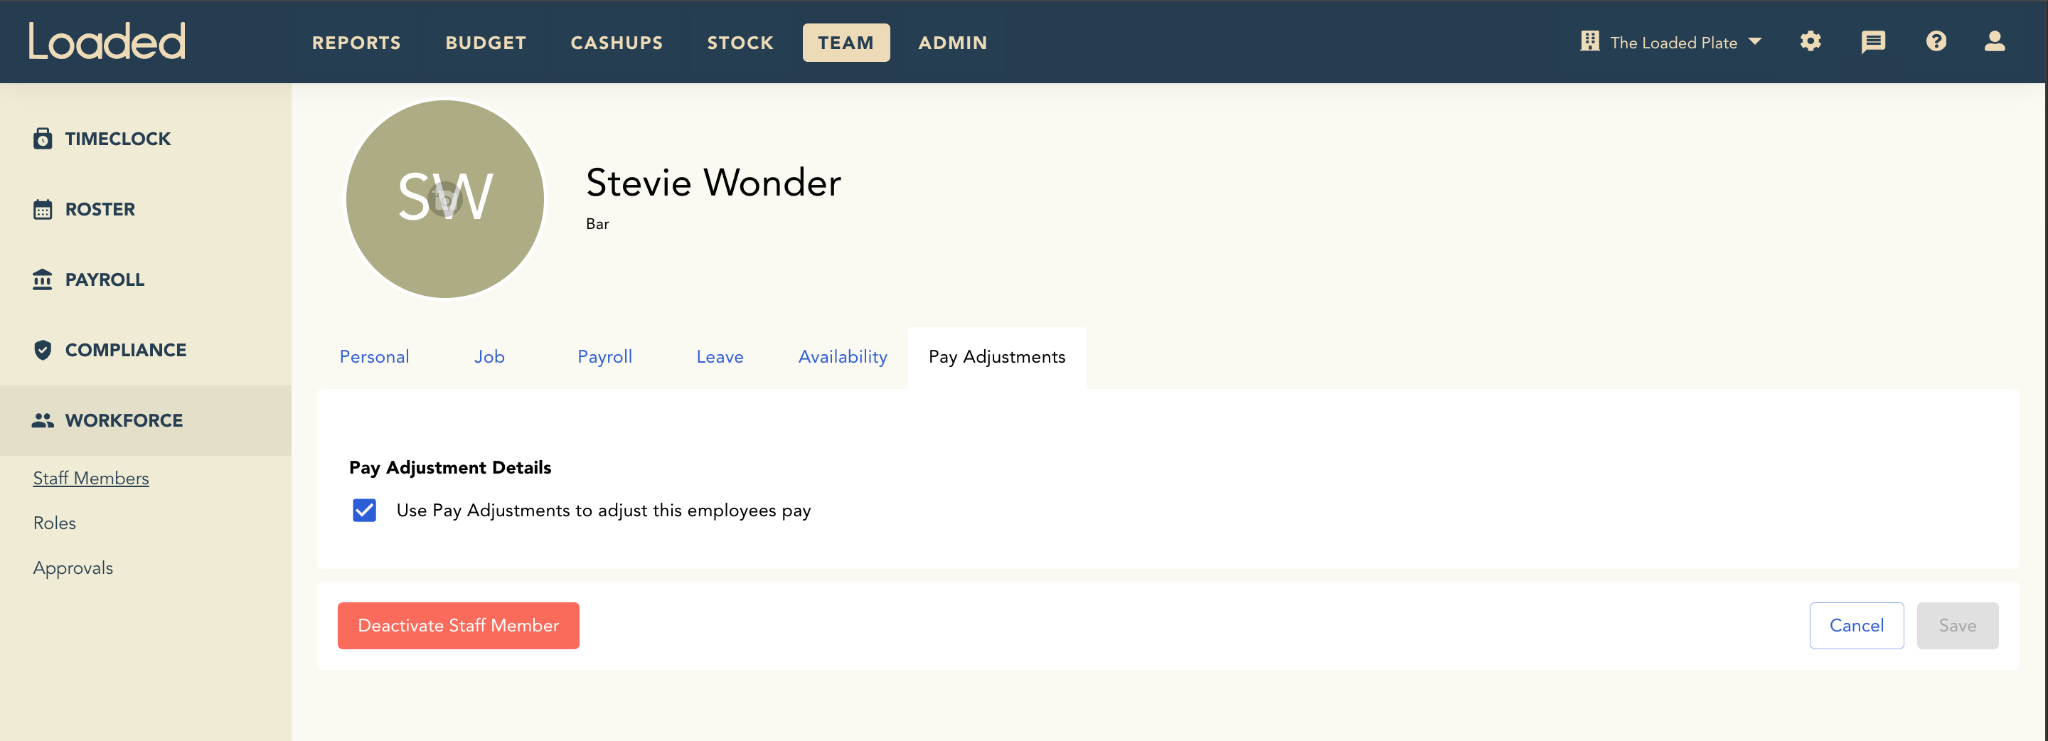
Determine whether pay adjustments apply to an individual staff member. Ticking "Use Pay Adjustments to adjust this employee's pay" lets Loaded automatically calculate rostered cost and actual pay based on the Industry Award (AU), On Cost, or Public Holiday rates enabled for your company.
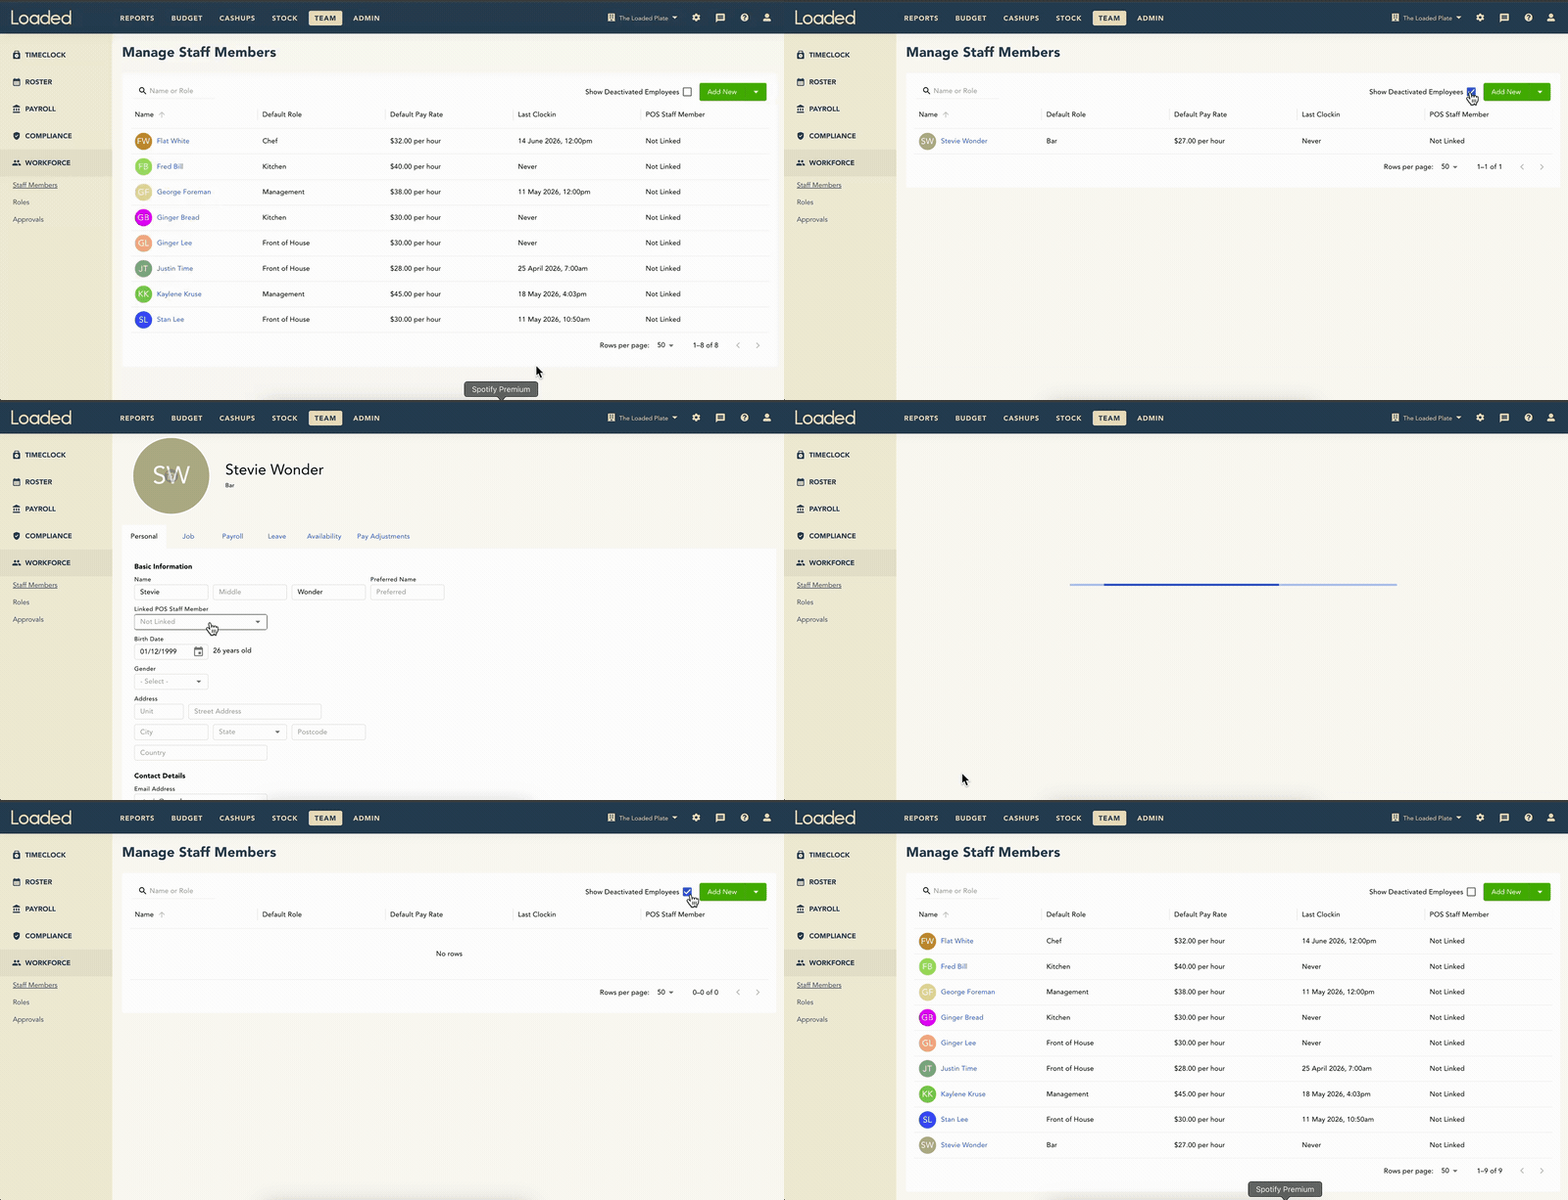
How to deactivate or restore a staff member
To deactivate: open the staff member's profile in Team → Workforce → Staff Members, scroll to the bottom, and click Deactivate Staff Member (from any tab).
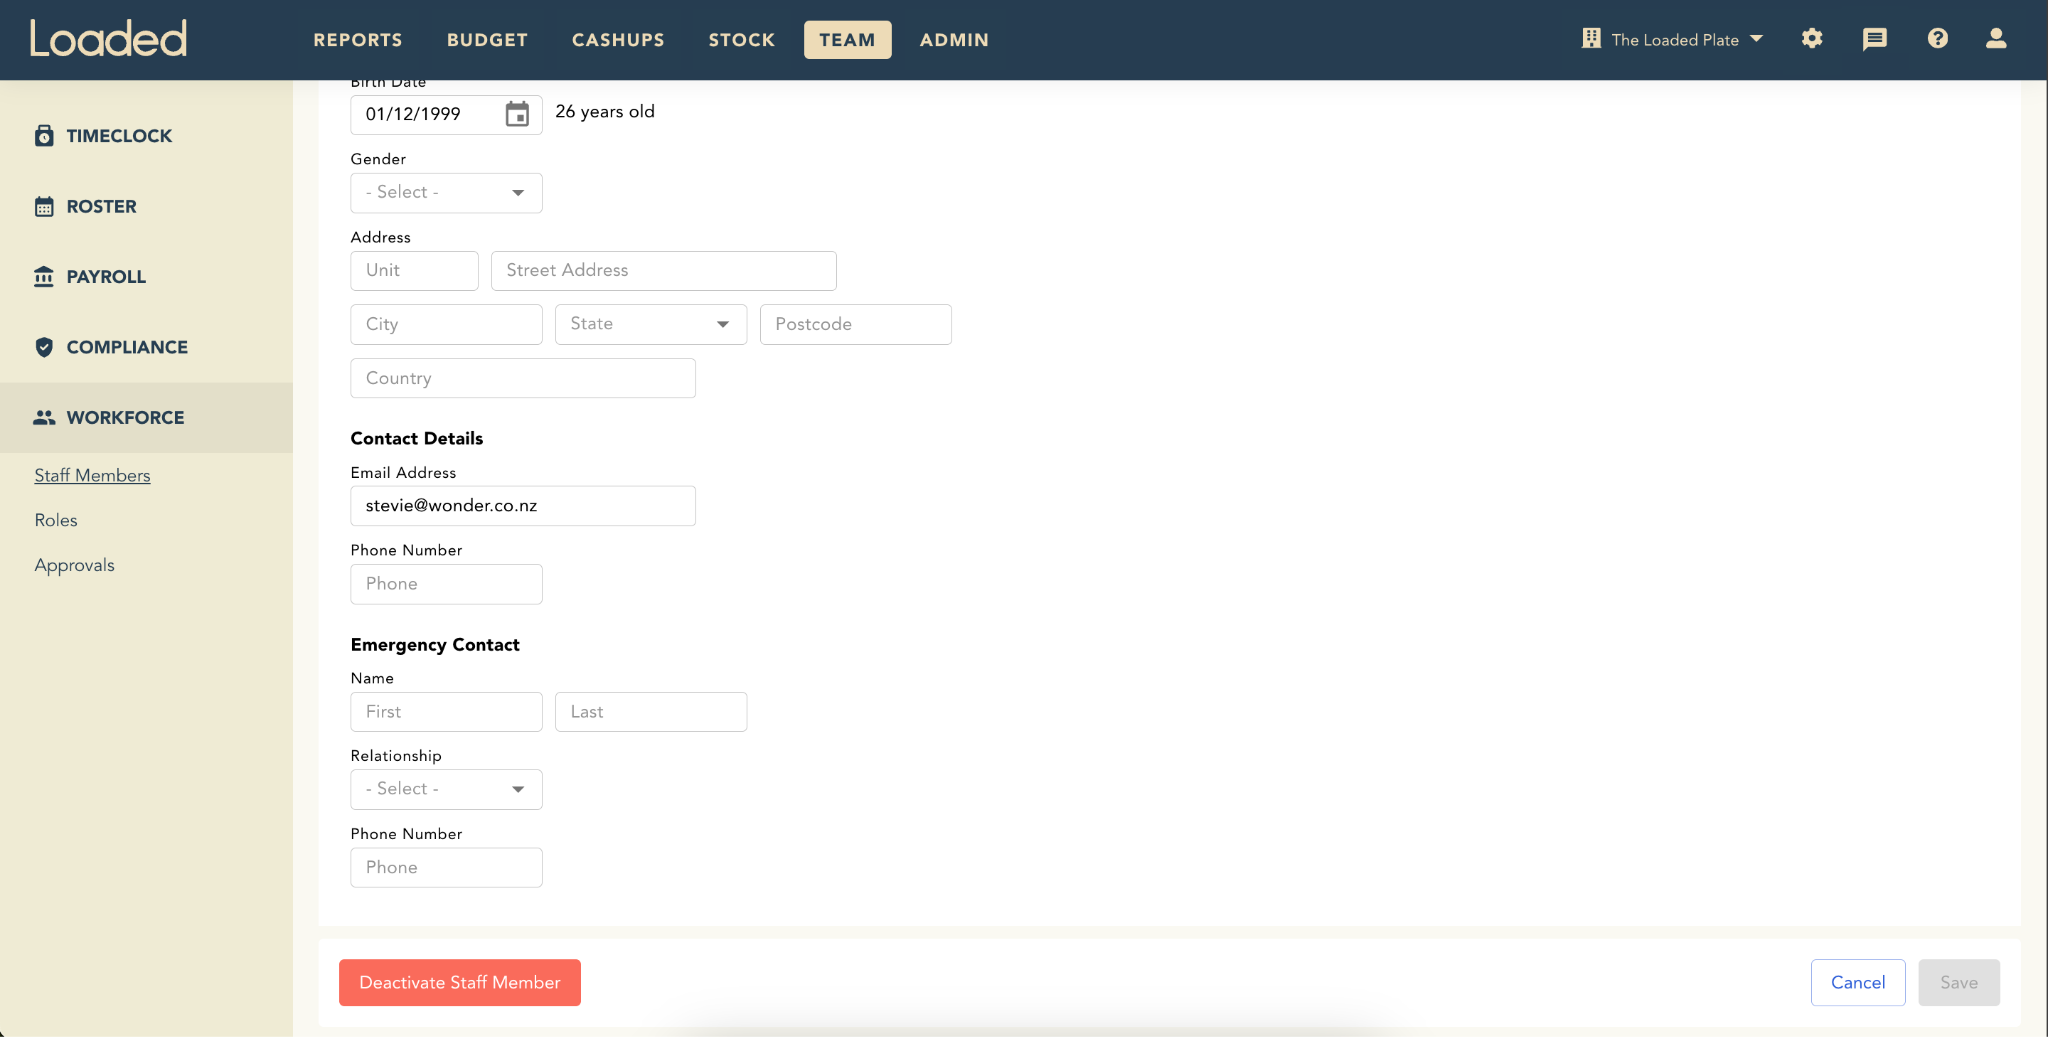
Once deactivated, they can no longer be added to a roster or clock in via the Timeclock App — their history stays in Loaded so Labour reports are unaffected.
To restore: click Show Deactivated Employees at the top of the Staff Members page, select the staff member, then click Restore Staff Member at the bottom of their profile. They'll return with the same information, roles, and pay rates as when deactivated.
Tips and tricks
- AU companies don't need to set a pay rate manually — set Role and Pay Classification and the rate is calculated for you
- Loaded's Xero Payroll integration currently only supports businesses in Australia
- Deactivated employees can be reactivated any time via the Show Deactivated Employee checkbox